

Developer Resources · Webhooks
Creating Webhooks
Create a webhook from the Monime dashboard, field by field: URL rules, verification methods, alert emails, API release, events and custom headers.
Creating a webhook takes a few minutes: you open a dialog, fill in the fields, and click Create. Monime starts sending events to your endpoint straight away. This guide walks through every field, what it controls, and why it matters, so whoever creates the webhook, a developer or someone on the operations team, configures it correctly.
Open the create dialog
- Go to Developer > Webhooks. The page lists your webhooks, or shows an empty state if you have none.
- Click Create webhook (top right).
- The Create Webhook dialog opens in full screen.
You can also open it by adding ?create=true to the webhooks URL.
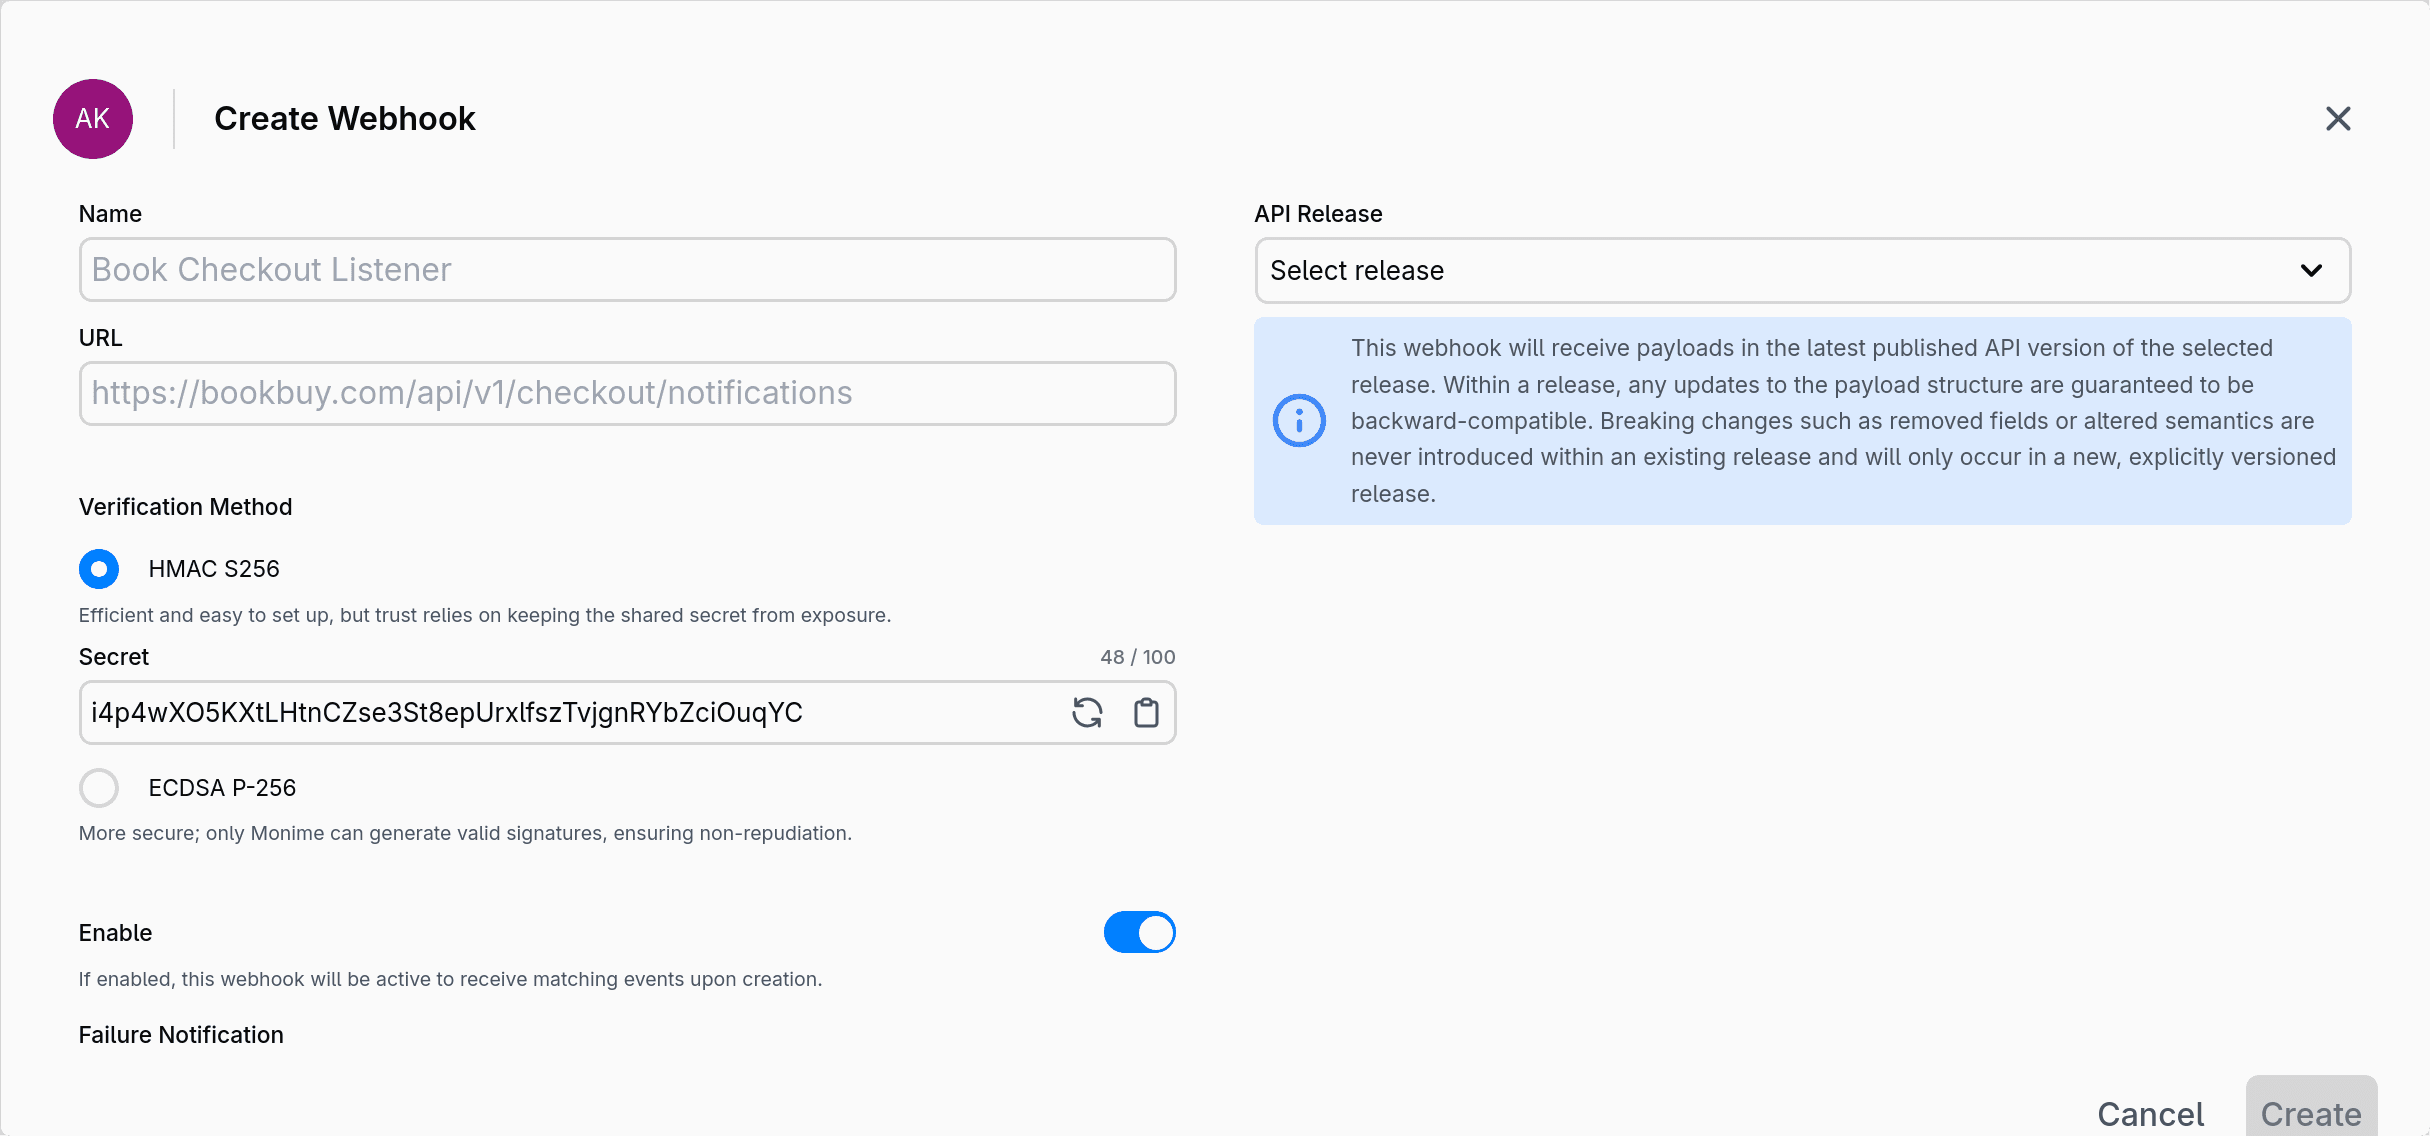
Basic information
Name
Required, 1 to 100 characters. A label that identifies the webhook in the list and on its details page. Describe its purpose or destination, so the right webhook is easy to find once you have several:
- By purpose: "Checkout Session to CRM"
- By environment: "Production Payments to Accounting"
- By system: "Analytics Pipeline"
Avoid generic names like "Webhook 1" or "Test".
URL
Required. The HTTPS endpoint that receives deliveries, up to 255 characters. For example, https://example.com/api/webhooks/monime.
| Rule | Why |
|---|---|
Must use https:// | Payloads can contain sensitive data, so Monime never sends them over plain HTTP |
| Must use a domain name, not an IP address | URLs such as https://192.168.1.1/webhooks or https://[::1]/webhooks are rejected |
Must not use localhost | Monime sends from its own servers, where localhost means Monime itself. To test on your machine, use a tunnel; see Testing locally |
If the URL breaks a rule, the dialog shows an error and the Create button stays disabled. If a URL looks right but is still rejected, check for extra spaces, missing slashes or a wrong port.
Enable
Default: enabled. An enabled webhook receives events as soon as it is created. Turn it off to finish setting things up before events start arriving, then enable it from the details page. A disabled webhook keeps its configuration; Monime simply sends it nothing.
Verification method
Required. Every delivery is signed, so your endpoint can prove it came from Monime. Without verification, anyone who discovers the URL could send fake events. See Verification and security for the code.
HMAC-SHA256
A secret shared between you and Monime. Monime signs each delivery with it, and your server computes the same signature and compares.
- The dialog generates a random secret. Click Regenerate for a new one, or paste your own.
- The secret must be 32 to 100 characters; the Create button stays disabled until it is.
- Store the secret securely: your server needs it to verify the
monime-signatureheader.
ECDSA P-256
Asymmetric signing. Monime signs with a private key only it holds, and you verify with the public key.
- Monime generates the key pair. The public key appears on the webhook details page after creation.
- Because only Monime can produce a valid signature, ECDSA also gives non-repudiation: you can prove to a third party that Monime sent a request. HMAC can't, because both sides hold the secret.
Most integrations use HMAC-SHA256: it is simpler to implement and enough for most needs.
Failure notification
Optional. Up to two email addresses that receive an alert when deliveries fail repeatedly, for example when:
- The endpoint is unreachable (DNS failure, timeout, connection refused).
- The endpoint keeps returning a non-2xx status.
Use a team inbox or distribution list, so alerts still reach someone when a person is away. An active webhook with no alert emails shows a warning in the list.
API release
Required. The release defines which events exist and the structure of their payloads. Within a release, Monime only adds fields and events; breaking changes happen only in a new release. Choose the release your endpoint's code expects: the wrong one means payloads your server doesn't understand.
Events
Required: 1 to 100 events from the selected release.
- Click the field to open the list, and search by name.
- Selected events appear as tags.
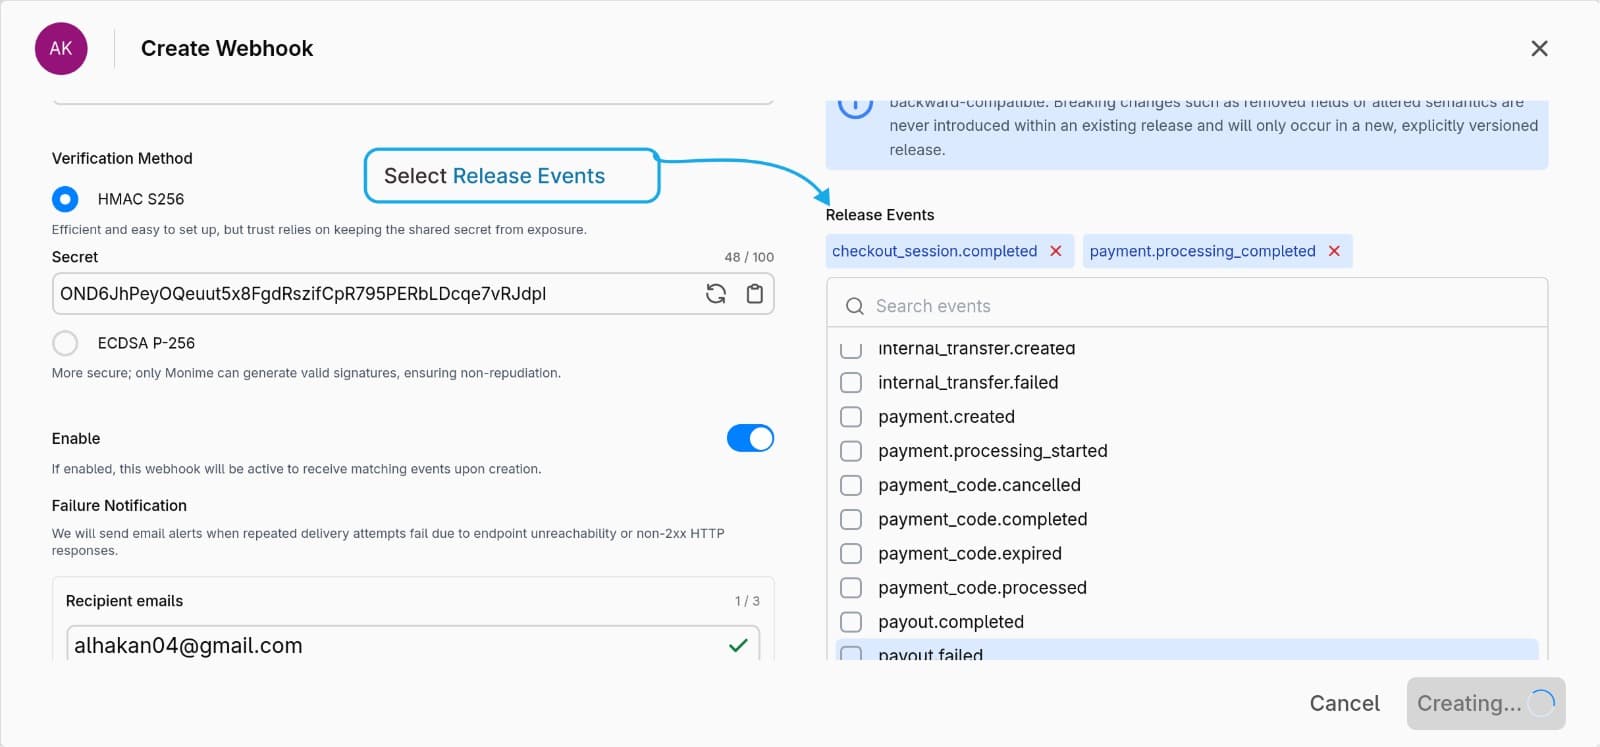
Common choices:
| Event | Fires when |
|---|---|
payment.processing_completed | A payment finishes processing |
checkout_session.completed | A customer completes a checkout session |
checkout_session.expired | A checkout session times out |
payment_code.processed | A payment code receives funds |
payout.completed | A payout reaches its destination |
payout.failed | A payout can't be completed |
See Events and payloads for every event in each release.
- Start with a small set and add more once deliveries work.
- If one endpoint handles several events, group them by handler.
- Your endpoint should return a 2xx even for events it ignores: an error triggers retries for events you never needed.
Custom headers (optional)
Up to 10 HTTP headers sent with every delivery. The usual reason is authentication: your endpoint can check a token before it verifies the signature.
| Use case | Header name | Example value |
|---|---|---|
| Bearer token | Authorization | Bearer sk_live_abc123 |
| API key | X-API-Key | your-api-key |
| Environment | X-Environment | production |
- Names may contain only letters, digits and hyphens (
[A-Za-z0-9-]+). - Values must be printable ASCII (space and tab allowed), with no control characters.
Create the webhook
The Create button is enabled only when:
- The name is not empty
- The URL is valid
- An API release is selected
- At least one event is selected
- The failure-notification list has no more than two valid email addresses
- For HMAC-SHA256, the secret is 32 to 100 characters
Click Create. The dialog closes and the new webhook appears in the list.
Check that it works
- Open the webhook from the list and scroll to Event Deliveries.
- Trigger an event you subscribed to, for example with a test payment.
- Wait a few seconds, then refresh.
- Confirm a delivery appears with status Success.
If the delivery shows Failed or Scheduled, open it to see the HTTP code and payload; see Monitoring and debugging. If nothing appears, check that the webhook is enabled and that the event you triggered is one you subscribed to.
Common mistakes
| Mistake | Result |
|---|---|
http:// instead of https:// | The URL is rejected |
localhost or an IP address | The URL is rejected |
| No alert emails | Nobody hears about failing deliveries |
| The wrong API release | Your server receives payloads it doesn't understand |
| Returning errors for unhandled events | Retries for events you never needed |