

Developer Resources · Webhooks
Managing Webhooks
Find, enable, disable and delete webhooks, update alert emails, copy verification credentials, and organise webhooks across environments and systems.
Once a webhook exists, you manage it from the Webhooks list and its details page: turn delivery on and off, keep alert emails current, copy the secret or public key, and delete webhooks you no longer need.
Webhook list
The Webhooks page (Developer > Webhooks) shows every webhook in the Space.
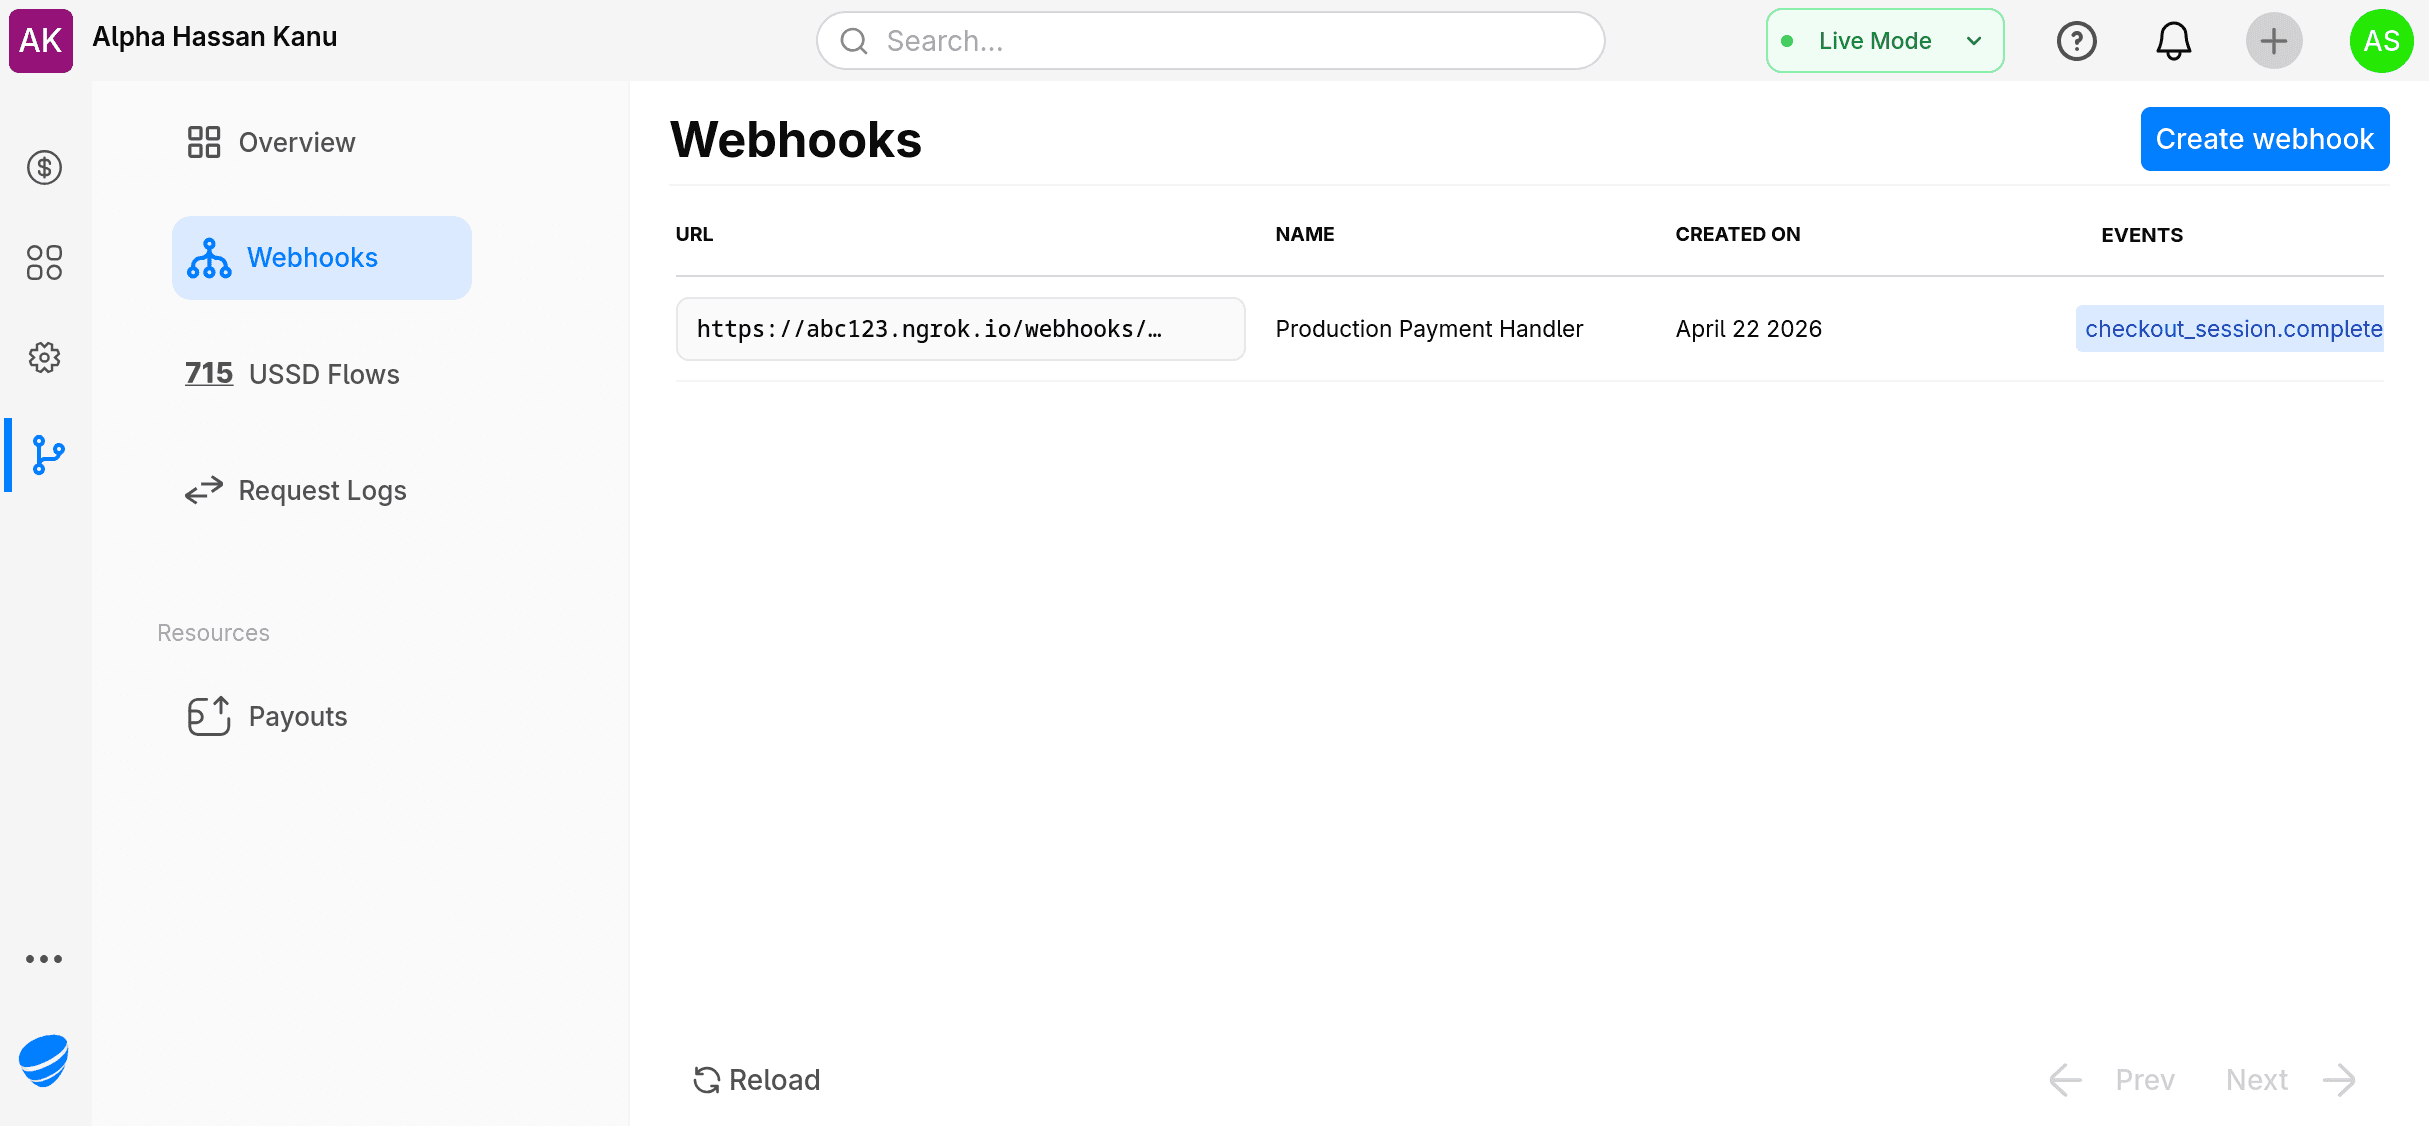
| Column | Description |
|---|---|
| URL | Endpoint URL. Hover to see the full URL. |
| Name | Webhook label |
| Created on | Creation date |
| Events | Subscribed events (tags; may be truncated) |
| Status | Active or Inactive |
| View logs | Link to the webhook's details and deliveries |
A warning icon appears next to the URL when a webhook is Active but has no alert emails. Add at least one, so someone hears about failing deliveries.
Webhook details page
Open a webhook to see its configuration and delivery history.
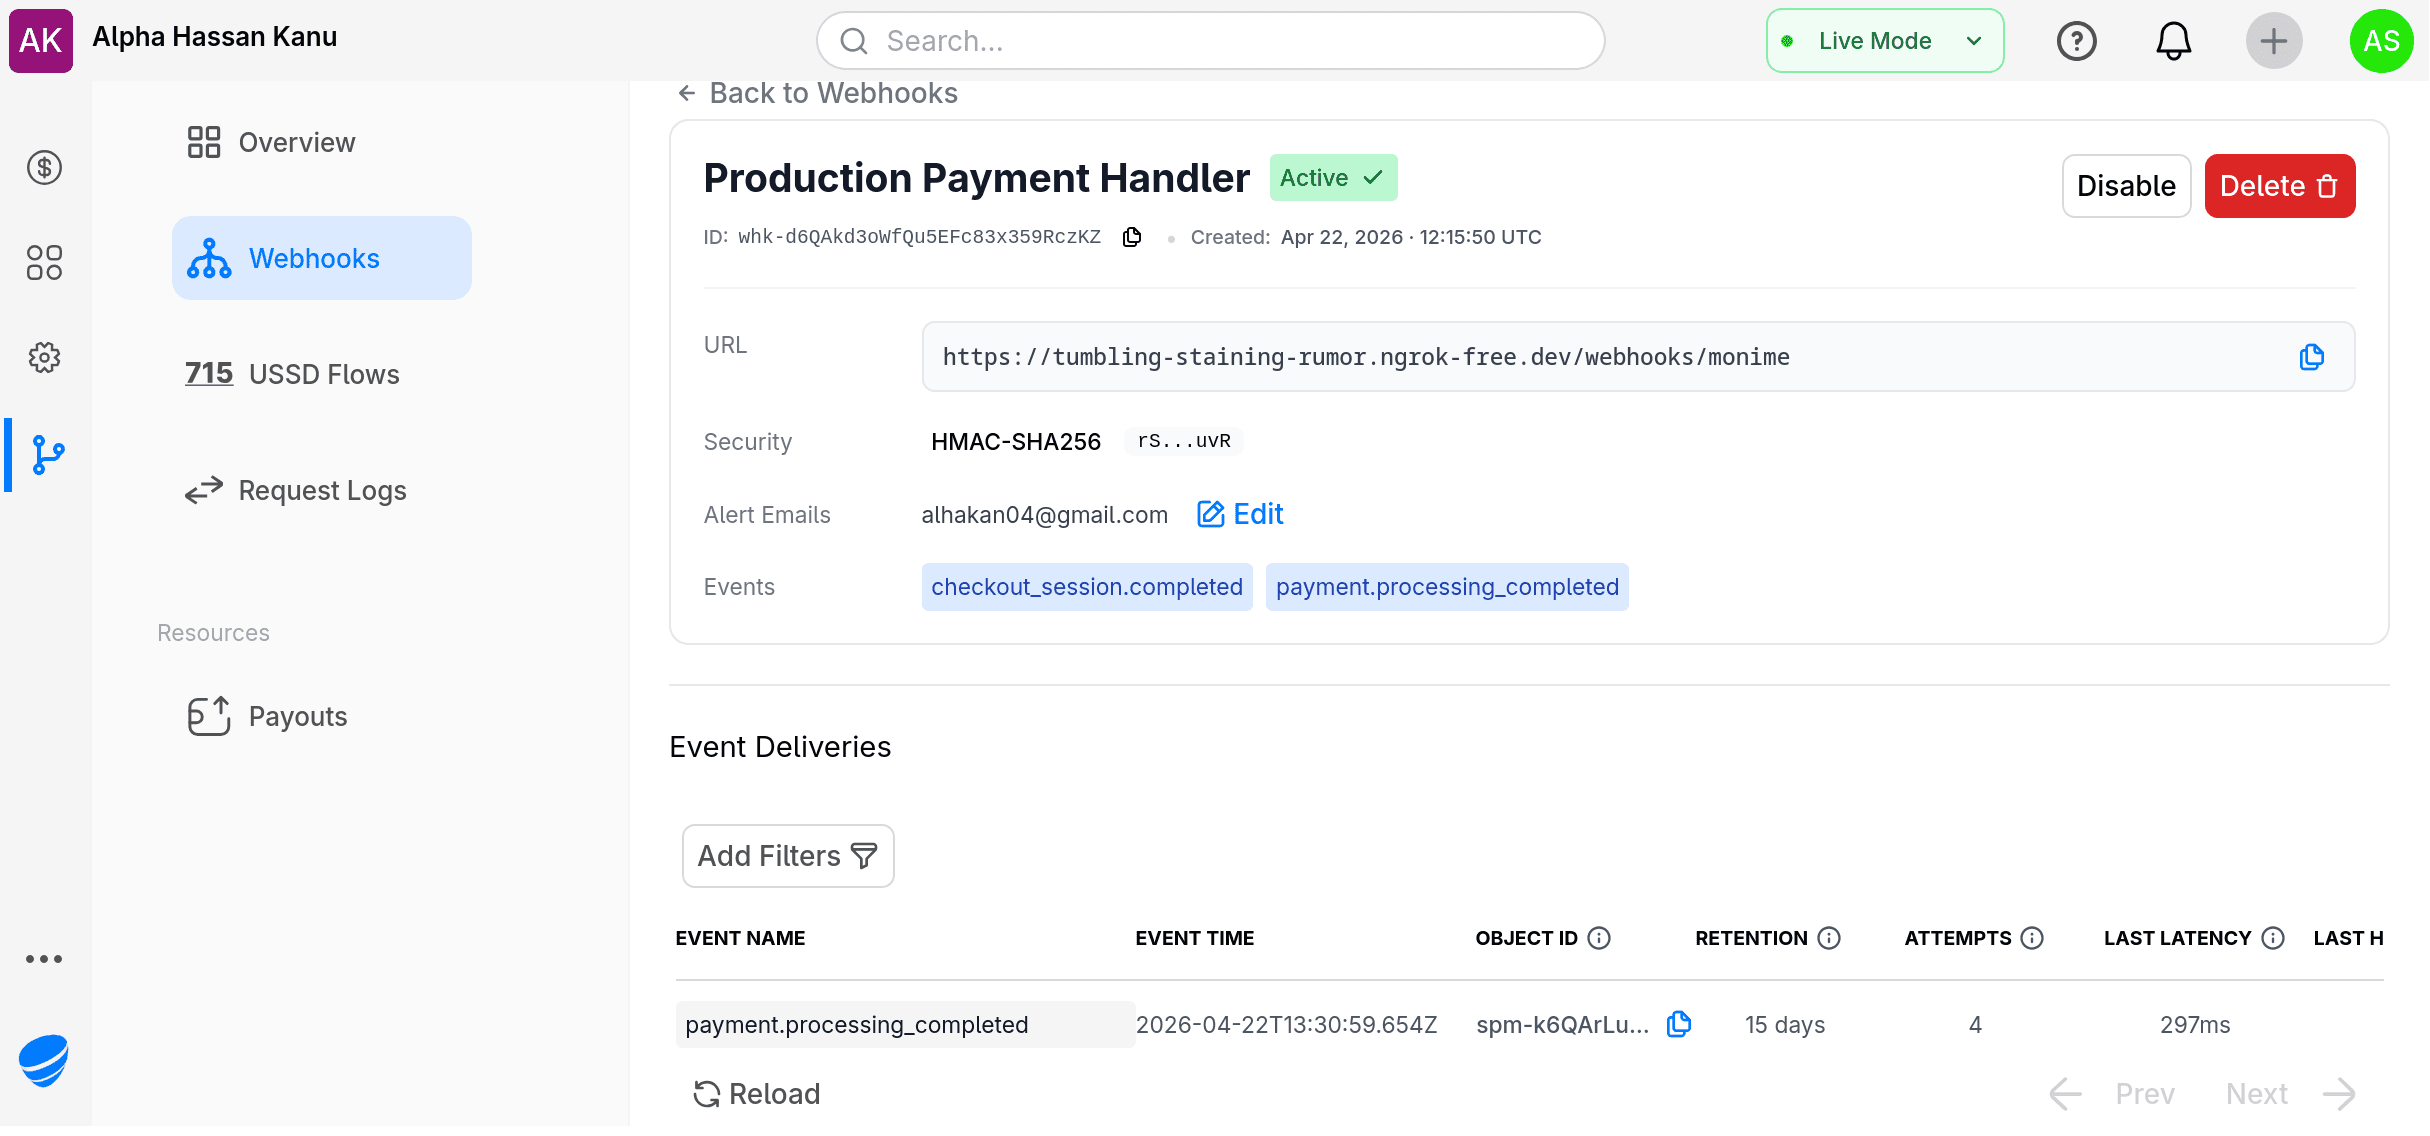
The header shows the name, status (Active or Inactive), a copyable ID, the creation time, and the Enable or Disable and Delete actions. Below it:
| Field | Description |
|---|---|
| URL | Endpoint URL |
| Security | Verification method (HMAC-SHA256 or ECDSA P-256) |
| Alert emails | Failure notification recipients |
| Events | Subscribed events |
Further down, the Event Deliveries table lists every delivery. See Monitoring and debugging.
Enable and disable
Disable a webhook to pause it without losing its configuration, for example while your endpoint is under maintenance, before you delete it, or while you debug something else.
- Open the webhook details page.
- Click Disable (or Enable).
- Confirm in the dialog.
| When disabled | When enabled again |
|---|---|
| No new deliveries are created | New events are delivered immediately |
| A scheduled retry is dropped only if the webhook is still disabled when the retry is due | Events that happened while it was disabled are not sent. Fetch those resources through the API if you need them |
Replay is unavailable while a webhook is disabled.
Edit alert emails
- Open the webhook details page.
- In Alert Emails, click Edit (or Add if none are set).
- Add, remove or change addresses, up to two in total.
- Click Save.
Changes apply to future failure alerts at once; past alerts are not resent. If alerts stop arriving, check spam folders, confirm the addresses, and check that deliveries are actually failing: no failures, no alerts.
Copy the secret or public key
Verification credentials are on the details page, under Security.
- HMAC-SHA256: the secret is masked. Show it or copy it, and keep it secret. If it may have leaked, create a new webhook with a fresh secret and delete the old one.
- ECDSA P-256: click View Public Key and copy the whole PEM, including its header and footer lines. The public key isn't secret; only Monime holds the private key.
Delete
Deleting is permanent. Consider disabling instead if you might need the webhook again.
- Open the webhook details page.
- Click Delete.
- Confirm in the dialog.
The webhook is removed, no new deliveries are created, scheduled deliveries are dropped, and its delivery logs become inaccessible. To undo a deletion, create a new webhook with the same configuration.
Organise multiple webhooks
- By environment: one webhook per environment (development, staging, production). With a single endpoint that routes events by name, this is the simplest setup.
- By system: one webhook per downstream system (accounting, CRM, notifications), each with its own events, secret and alert emails.
- By event group: separate high-volume events from low-volume, critical ones.
- By release: one webhook per API release, if you use more than one.
Avoid many webhooks pointing at the same endpoint: each adds configuration and makes monitoring harder.
Create a new webhook or update?
| Create a new webhook when | Update the existing one when |
|---|---|
| Changing the URL, if the dashboard doesn't allow it | Enabling or disabling |
| Rotating the HMAC secret | Changing alert emails |
| Switching the verification method | Changing the name, if supported |
| Moving to an API release with breaking changes |